MySQL एक मुक्त स्रोत मुक्त संबंधपरक डेटाबेस प्रबंधन प्रणाली है (RDBMS ) GNU . के तहत जारी किया गया (सामान्य सार्वजनिक लाइसेंस ) इसका उपयोग प्रत्येक बनाए गए डेटाबेस में बहु-उपयोगकर्ता पहुंच प्रदान करके किसी एकल सर्वर पर एकाधिक डेटाबेस चलाने के लिए किया जाता है।
यह लेख आपको नवीनतम MySQL 8.0 को स्थापित करने और अपडेट करने की प्रक्रिया के बारे में बताएगा RHEL/CentOS 8/7/6/ . पर संस्करण और फेडोरा MySQL यम . का उपयोग करके YUM उपयोगिता के माध्यम से भंडार।
चरण 1:MySQL Yum रिपोजिटरी जोड़ना
1. हम आधिकारिक MySQL यम . का उपयोग करेंगे सॉफ्टवेयर रिपॉजिटरी, जो RHEL/CentOS 8/7/6/ और फेडोरा 30-35 ।
महत्वपूर्ण :ये निर्देश केवल MySQL . के नए इंस्टालेशन पर काम करते हैं सर्वर पर, यदि पहले से ही एक MySQL . है किसी तृतीय-पक्ष-वितरित RPM पैकेज का उपयोग करके स्थापित किया गया है, तो मैं आपको इंस्टॉल किए गए MySQL को अपग्रेड या बदलने की सलाह देता हूं। MySQL यम रिपोजिटरी . का उपयोग करके पैकेज .
पुराने MySQL पैकेज को अपग्रेड करने या बदलने से पहले, हमारे बैकअप MySQL डेटाबेस गाइड का उपयोग करके सभी महत्वपूर्ण डेटाबेस बैकअप और कॉन्फ़िगरेशन फ़ाइलों को लेना न भूलें।
2. अब निम्न MySQL Yum रिपॉजिटरी को डाउनलोड करें और जोड़ें MySQL के नवीनतम संस्करण (यानी 8.0) को स्थापित करने के लिए अपने संबंधित Linux वितरण सिस्टम की रिपॉजिटरी सूची में 27 जुलाई 2018 . को जारी किया गया )।
--------------- On RHEL/CentOS 8 ---------------
# wget https://repo.mysql.com/mysql80-community-release-el8-1.noarch.rpm
--------------- On RHEL/CentOS 7 ---------------
# wget https://repo.mysql.com/mysql80-community-release-el7-1.noarch.rpm
--------------- On RHEL/CentOS 6 ---------------
# wget https://dev.mysql.com/get/mysql80-community-release-el6-1.noarch.rpm
--------------- On Fedora 35 ---------------
# wget https://dev.mysql.com/get/mysql80-community-release-fc35-1.noarch.rpm
--------------- On Fedora 34 ---------------
# wget https://dev.mysql.com/get/mysql80-community-release-fc34-1.noarch.rpm
--------------- On Fedora 33 ---------------
# wget https://dev.mysql.com/get/mysql80-community-release-fc33-1.noarch.rpm
3. अपने Linux प्लेटफॉर्म के लिए पैकेज डाउनलोड करने के बाद, अब डाउनलोड किए गए पैकेज को निम्न कमांड के साथ इंस्टॉल करें।
--------------- On RHEL/CentOS 8 ---------------
# yum localinstall mysql80-community-release-el8-1.noarch.rpm
--------------- On RHEL/CentOS 7 ---------------
# yum localinstall mysql80-community-release-el7-1.noarch.rpm
--------------- On RHEL/CentOS 6 ---------------
# yum localinstall mysql80-community-release-el6-1.noarch.rpm
--------------- On Fedora 35 ---------------
# dnf localinstall mysql80-community-release-fc35-1.noarch.rpm
--------------- On Fedora 34 ---------------
# dnf localinstall mysql80-community-release-fc34-1.noarch.rpm
--------------- On Fedora 33 ---------------
# yum localinstall mysql80-community-release-fc33-1.noarch.rpm
उपरोक्त इंस्टॉलेशन कमांड MySQL Yum को जोड़ता है सिस्टम की रिपॉजिटरी सूची में भंडार और संकुल की अखंडता को सत्यापित करने के लिए GnuPG कुंजी डाउनलोड करता है।
4. आप निम्न कमांड का उपयोग करके सत्यापित कर सकते हैं कि MySQL Yum रिपॉजिटरी को सफलतापूर्वक जोड़ा गया है।
# yum repolist enabled | grep "mysql.*-community.*"
# dnf repolist enabled | grep "mysql.*-community.*"      [On Fedora versions]


चरण 2:नवीनतम MySQL संस्करण स्थापित करना
5. MySQL का नवीनतम संस्करण स्थापित करें (वर्तमान में 8.0 ) निम्न आदेश का उपयोग कर।
# yum install mysql-community-server
# dnf install mysql-community-server      [On Fedora versions]
उपरोक्त आदेश MySQL सर्वर के लिए सभी आवश्यक पैकेज स्थापित करता है mysql-community-server , mysql-समुदाय-क्लाइंट , mysql-समुदाय-आम और mysql-community-libs ।
चरण 3:विभिन्न MySQL रिलीज़ संस्करण स्थापित करना
6. आप MySQL कम्युनिटी सर्वर के विभिन्न उप-भंडारों का उपयोग करके विभिन्न MySQL संस्करण भी स्थापित कर सकते हैं। हाल की MySQL श्रृंखला के लिए उप-भंडार (वर्तमान में MySQL 8.0 ) डिफ़ॉल्ट रूप से सक्रिय होता है, और अन्य सभी संस्करणों (उदाहरण के लिए, MySQL 5.x श्रृंखला) के लिए उप-भंडार डिफ़ॉल्ट रूप से निष्क्रिय हो जाते हैं।
किसी विशिष्ट उप-भंडार से विशिष्ट संस्करण स्थापित करने के लिए, आप --enable का उपयोग कर सकते हैं या --disable yum-config-manager . का उपयोग करने वाले विकल्प या dnf config-manager जैसा दिखाया गया है:
# yum-config-manager --disable mysql57-community
# yum-config-manager --enable mysql56-community
------------------ Fedora Versions ------------------
# dnf config-manager --disable mysql57-community
# dnf config-manager --enable mysql56-community
चरण 4:MySQL सर्वर प्रारंभ करना
7. MySQL की सफल स्थापना के बाद, MySQL सर्वर को निम्न कमांड के साथ शुरू करने और सक्षम करने का समय आ गया है:
# service mysqld start
# systemctl enable mysqld.service
आप निम्न कमांड की मदद से MySQL सर्वर की स्थिति को सत्यापित कर सकते हैं।
# systemctl status mysqld.service
OR
# service mysqld status
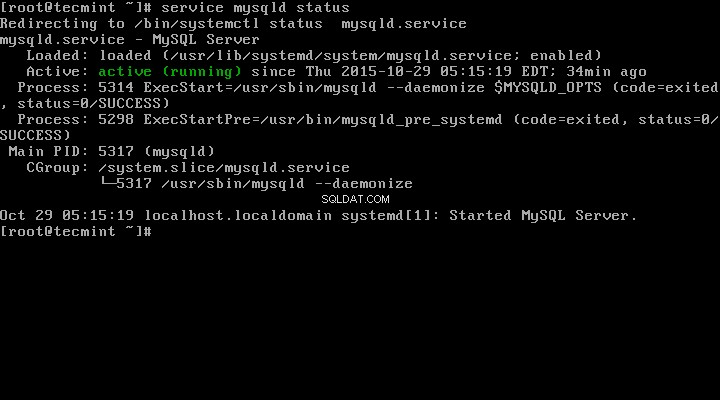
यह मेरे CentOS 7 बॉक्स के अंतर्गत MySQL चलाने का नमूना आउटपुट है।
Redirecting to /bin/systemctl status  mysqld.service
mysqld.service - MySQL Server
   Loaded: loaded (/usr/lib/systemd/system/mysqld.service; enabled)
   Active: active (running) since Thu 2015-10-29 05:15:19 EDT; 4min 5s ago
  Process: 5314 ExecStart=/usr/sbin/mysqld --daemonize $MYSQLD_OPTS (code=exited, status=0/SUCCESS)
  Process: 5298 ExecStartPre=/usr/bin/mysqld_pre_systemd (code=exited, status=0/SUCCESS)
 Main PID: 5317 (mysqld)
   CGroup: /system.slice/mysqld.service
           └─5317 /usr/sbin/mysqld --daemonize

Oct 29 05:15:19 localhost.localdomain systemd[1]: Started MySQL Server.

8. अब अंत में निम्नलिखित कमांड का उपयोग करके स्थापित MySQL संस्करण को सत्यापित करें।
# mysql --version

mysql  Ver 8.0.27 for Linux on x86_64 (MySQL Community Server - GPL)


चरण 5:MySQL इंस्टालेशन को सुरक्षित करना
9. कमांड mysql_secure_installation रूट पासवर्ड सेट करने, अनाम उपयोगकर्ताओं को हटाने, रूट लॉगिन को हटाने, और इसी तरह की महत्वपूर्ण सेटिंग्स करके आपको अपने MySQL इंस्टॉलेशन को सुरक्षित करने की अनुमति देता है।
नोट :MySQL संस्करण 8.0 या उच्चतर /var/log/mysqld.log . में एक अस्थायी यादृच्छिक पासवर्ड उत्पन्न करता है स्थापना के बाद।
MySQL सुरक्षित कमांड चलाने से पहले पासवर्ड देखने के लिए नीचे दिए गए कमांड का उपयोग करें।
# grep 'temporary password' /var/log/mysqld.log
एक बार जब आप पासवर्ड जान लेते हैं तो अब आप अपने MySQL इंस्टॉलेशन को सुरक्षित करने के लिए निम्न कमांड चला सकते हैं।
# mysql_secure_installation
नोट :नया रूट पासवर्ड दर्ज करें जिसका अर्थ है फ़ाइल से आपका अस्थायी पासवर्ड /var/log/mysqld.log ।
अब ऑनस्क्रीन निर्देशों का ध्यानपूर्वक पालन करें, संदर्भ के लिए उपरोक्त कमांड का आउटपुट नीचे देखें।
नमूना आउटपुट
Securing the MySQL server deployment.

Enter password for user root: Enter New Root Password

VALIDATE PASSWORD PLUGIN can be used to test passwords
and improve security. It checks the strength of password
and allows the users to set only those passwords which are
secure enough. Would you like to setup VALIDATE PASSWORD plugin?

Press y|Y for Yes, any other key for No: y

There are three levels of password validation policy:

LOW    Length >= 8
MEDIUM Length >= 8, numeric, mixed case, and special characters
STRONG Length >= 8, numeric, mixed case, special characters and dictionary                  file

Please enter 0 = LOW, 1 = MEDIUM and 2 = STRONG: 2
Using existing password for root.

Estimated strength of the password: 50
Change the password for root ? ((Press y|Y for Yes, any other key for No) : y

New password: Set New MySQL Password

Re-enter new password: Re-enter New MySQL Password

Estimated strength of the password: 100
Do you wish to continue with the password provided?(Press y|Y for Yes, any other key for No) : y
By default, a MySQL installation has an anonymous user,
allowing anyone to log into MySQL without having to have
a user account created for them. This is intended only for
testing, and to make the installation go a bit smoother.
You should remove them before moving into a production
environment.

Remove anonymous users? (Press y|Y for Yes, any other key for No) : y
Success.


Normally, root should only be allowed to connect from
'localhost'. This ensures that someone cannot guess at
the root password from the network.

Disallow root login remotely? (Press y|Y for Yes, any other key for No) : y
Success.

By default, MySQL comes with a database named 'test' that
anyone can access. This is also intended only for testing,
and should be removed before moving into a production
environment.

Remove test database and access to it? (Press y|Y for Yes, any other key for No) : y
 - Dropping test database...
Success.

 - Removing privileges on test database...
Success.

Reloading the privilege tables will ensure that all changes
made so far will take effect immediately.

Reload privilege tables now? (Press y|Y for Yes, any other key for No) : y
Success.

All done!
चरण 6:MySQL सर्वर से कनेक्ट करना
10. एक उपयोगकर्ता नाम और पासवर्ड प्रदान करके एक नए स्थापित MySQL सर्वर से कनेक्ट करें।
# mysql -u root -p
नमूना आउटपुट:
Welcome to the MySQL monitor.  Commands end with ; or \g.
Your MySQL connection id is 11
Server version: 8.0.27 MySQL Community Server - GPL

Copyright (c) 2000, 2021, Oracle and/or its affiliates.

Oracle is a registered trademark of Oracle Corporation and/or its
affiliates. Other names may be trademarks of their respective
owners.

Type 'help;' or '\h' for help. Type '\c' to clear the current input statement.

mysql>
चरण 7:MySQL को Yum के साथ अपडेट करना
11. नए इंस्टॉलेशन के अलावा, आप निम्न कमांड की मदद से MySQL उत्पादों और घटकों के लिए अपडेट भी कर सकते हैं।
# yum update mysql-server
# dnf update mysql-server       [On Fedora versions]

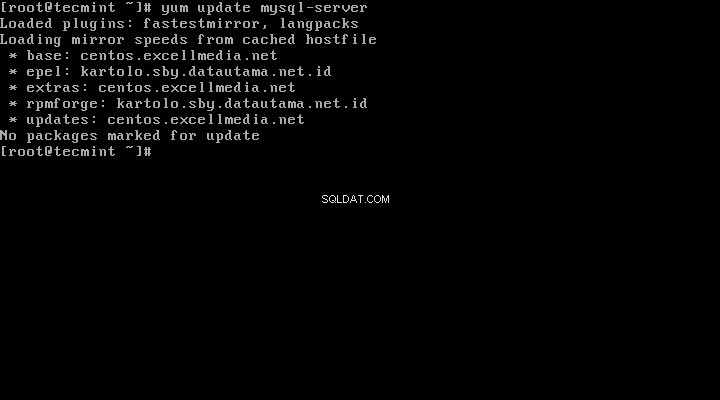
जब MySQL के लिए नए अपडेट उपलब्ध होंगे, तो यह उन्हें ऑटो-इंस्टॉल कर देगा, यदि नहीं तो आपको यह कहते हुए एक संदेश मिलेगा कि अपडेट के लिए कोई पैकेज चिह्नित नहीं है ।
बस, आपने MySQL 8.0 को सफलतापूर्वक इंस्टॉल कर लिया है आपके सिस्टम पर। यदि आपको स्थापित करने में कोई समस्या आ रही है तो समाधान के लिए हमारे टिप्पणी अनुभाग का उपयोग करने में संकोच न करें।

