यह PHP और MySQL के साथ ब्लॉग कैसे बनाएं पर 4-भाग श्रृंखला का भाग 3 है। आप पिछले दो भागों को यहां देख सकते हैं:भाग 1, भाग 2।
इस ट्यूटोरियल के अंतिम दो भागों में, हमने सार्वजनिक क्षेत्र बनाना समाप्त कर दिया है। हमने अपना डेटाबेस भी सेट किया, डेटाबेस टेबल में कुछ डेटा डाला और इसे क्वेरी करने और पेज पर प्रदर्शित करने में सक्षम थे। लेकिन हम हमेशा PHPMyAdmin जैसे डेटाबेस क्लाइंट का उपयोग करके उपयोगकर्ता, पोस्ट, विषय नहीं बनाना चाहते हैं, है ना? हम वेबसाइट पर एक इंटरफ़ेस चाहते हैं और ऐसा करने के लिए व्यवस्थापक विशेषाधिकारों के साथ एक लॉग इन उपयोगकर्ता चाहते हैं।
जब व्यवस्थापक विशेषाधिकार वाले उपयोगकर्ता लॉग इन करते हैं, तो वे स्वचालित रूप से व्यवस्थापक डैशबोर्ड पर पुनर्निर्देशित हो जाते हैं। लेकिन हमने अभी तक अपने सिस्टम में एडमिन यूजर नहीं बनाया है। हम इसे जल्द ही करेंगे।
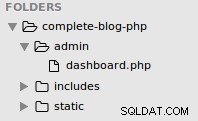
अपने पूर्ण-ब्लॉग-php/व्यवस्थापक फ़ोल्डर में, डैशबोर्ड.php नाम की एक फ़ाइल बनाएं।
डैशबोर्ड.php:
<?php include('../config.php'); ?>
<?php include(ROOT_PATH . '/admin/includes/admin_functions.php'); ?>
<?php include(ROOT_PATH . '/admin/includes/head_section.php'); ?>
<title>Admin | Dashboard</title>
</head>
<body>
<div class="header">
<div class="logo">
<a href="<?php echo BASE_URL .'admin/dashboard.php' ?>">
<h1>LifeBlog - Admin</h1>
</a>
</div>
<?php if (isset($_SESSION['user'])): ?>
<div class="user-info">
<span><?php echo $_SESSION['user']['username'] ?></span>
<a href="<?php echo BASE_URL . '/logout.php'; ?>" class="logout-btn">logout</a>
</div>
<?php endif ?>
</div>
<div class="container dashboard">
<h1>Welcome</h1>
<div class="stats">
<a href="users.php" class="first">
<span>43</span> <br>
<span>Newly registered users</span>
</a>
<a href="posts.php">
<span>43</span> <br>
<span>Published posts</span>
</a>
<a>
<span>43</span> <br>
<span>Published comments</span>
</a>
</div>
<br><br><br>
<div class="buttons">
<a href="users.php">Add Users</a>
<a href="posts.php">Add Posts</a>
</div>
</div>
</body>
</html>
अपने ब्राउज़र पर, https://localhost/complete-blog-php/admin/dashboard.php पर जाएं और आप देखेंगे कि कोई स्टाइल नहीं है और कुछ दो फाइलों को शामिल करने में विफलता के बारे में त्रुटि संदेश हैं। ऐसा इसलिए है क्योंकि हमने अभी तक ये फ़ाइलें नहीं बनाई हैं। हम इसे जल्द ही करेंगे।
अपने व्यवस्थापक फ़ोल्डर के अंदर एक फ़ोल्डर बनाएं जिसका नाम शामिल है।

हमने व्यवस्थापक क्षेत्र के लिए एक अलग फ़ोल्डर बनाने का कारण यह सुनिश्चित करना है कि सभी व्यवस्थापक फ़ाइलें एक फ़ोल्डर (व्यवस्थापक) में हैं। बाद में, हम htaccess प्रमाणीकरण का उपयोग करके व्यवस्थापक फ़ोल्डर की सुरक्षा को मजबूत कर सकते हैं। हालांकि हम इस ट्यूटोरियल में ऐसा नहीं करेंगे।
इसमें नए बनाए गए फ़ोल्डर में शामिल हैं, एक फ़ाइल बनाएं जिसका नाम हेड_सेक्शन.php है। Head_section.php खोलें और इस कोड को इसमें जोड़ें:
<!DOCTYPE html>
<html>
<head>
<meta charset="UTF-8">
<!-- Google Fonts -->
<link href="https://fonts.googleapis.com/css?family=Averia+Serif+Libre|Noto+Serif|Tangerine" rel="stylesheet">
<!-- Font awesome -->
<link rel="stylesheet" href="https://cdnjs.cloudflare.com/ajax/libs/font-awesome/4.7.0/css/font-awesome.min.css" />
<!-- ckeditor -->
<script src="https://cdnjs.cloudflare.com/ajax/libs/ckeditor/4.8.0/ckeditor.js"></script>
<!-- Styling for public area -->
<link rel="stylesheet" href="../static/css/admin_styling.css">
ब्राउज़र पर डैशबोर्ड.php पृष्ठ को पुनः लोड करें। अब जो त्रुटि संदेश बचा है वह सिर्फ एक फ़ाइल (admin_functions.php) के लिए है। हम जल्द ही उस पर आएंगे।
एक बार बैकएंड में, उपयोगकर्ता उपयोगकर्ता, पोस्ट और विषय बना सकता है, पढ़ सकता है, अपडेट कर सकता है और हटा सकता है। आइए उपयोगकर्ताओं के साथ शुरू करते हैं। अपने व्यवस्थापक फ़ोल्डर में, उपयोगकर्ता नाम की एक फ़ाइल बनाएँ। PHP

अब users.php खोलें और इस कोड को इसमें जोड़ें:
users.php:
<?php include('../config.php'); ?>
<?php include(ROOT_PATH . '/admin/includes/admin_functions.php'); ?>
<?php
// Get all admin users from DB
$admins = getAdminUsers();
$roles = ['Admin', 'Author'];
?>
<?php include(ROOT_PATH . '/admin/includes/head_section.php'); ?>
<title>Admin | Manage users</title>
</head>
<body>
<!-- admin navbar -->
<?php include(ROOT_PATH . '/admin/includes/navbar.php') ?>
<div class="container content">
<!-- Left side menu -->
<?php include(ROOT_PATH . '/admin/includes/menu.php') ?>
<!-- Middle form - to create and edit -->
<div class="action">
<h1 class="page-title">Create/Edit Admin User</h1>
<form method="post" action="<?php echo BASE_URL . 'admin/users.php'; ?>" >
<!-- validation errors for the form -->
<?php include(ROOT_PATH . '/includes/errors.php') ?>
<!-- if editing user, the id is required to identify that user -->
<?php if ($isEditingUser === true): ?>
<input type="hidden" name="admin_id" value="<?php echo $admin_id; ?>">
<?php endif ?>
<input type="text" name="username" value="<?php echo $username; ?>" placeholder="Username">
<input type="email" name="email" value="<?php echo $email ?>" placeholder="Email">
<input type="password" name="password" placeholder="Password">
<input type="password" name="passwordConfirmation" placeholder="Password confirmation">
<select name="role">
<option value="" selected disabled>Assign role</option>
<?php foreach ($roles as $key => $role): ?>
<option value="<?php echo $role; ?>"><?php echo $role; ?></option>
<?php endforeach ?>
</select>
<!-- if editing user, display the update button instead of create button -->
<?php if ($isEditingUser === true): ?>
<button type="submit" class="btn" name="update_admin">UPDATE</button>
<?php else: ?>
<button type="submit" class="btn" name="create_admin">Save User</button>
<?php endif ?>
</form>
</div>
<!-- // Middle form - to create and edit -->
<!-- Display records from DB-->
<div class="table-div">
<!-- Display notification message -->
<?php include(ROOT_PATH . '/includes/messages.php') ?>
<?php if (empty($admins)): ?>
<h1>No admins in the database.</h1>
<?php else: ?>
<table class="table">
<thead>
<th>N</th>
<th>Admin</th>
<th>Role</th>
<th colspan="2">Action</th>
</thead>
<tbody>
<?php foreach ($admins as $key => $admin): ?>
<tr>
<td><?php echo $key + 1; ?></td>
<td>
<?php echo $admin['username']; ?>,
<?php echo $admin['email']; ?>
</td>
<td><?php echo $admin['role']; ?></td>
<td>
<a class="fa fa-pencil btn edit"
href="users.php?edit-admin=<?php echo $admin['id'] ?>">
</a>
</td>
<td>
<a class="fa fa-trash btn delete"
href="users.php?delete-admin=<?php echo $admin['id'] ?>">
</a>
</td>
</tr>
<?php endforeach ?>
</tbody>
</table>
<?php endif ?>
</div>
<!-- // Display records from DB -->
</div>
</body>
</html>
हमें केवल user.php फ़ाइल में यही करना होगा। इस एक फ़ाइल में उपयोगकर्ता बनाना, संपादित करना और हटाना होगा।
users.php फ़ाइल के शीर्ष पर, हम एक फ़ंक्शन को कॉल कर रहे हैं getAdminUsers() जो डेटाबेस से सभी व्यवस्थापक उपयोगकर्ताओं की एक सरणी देता है। इस फ़ंक्शन को admin_functions.php फ़ाइल के अंदर परिभाषित किया जाना है जिसे हमने अभी तक नहीं बनाया है लेकिन आप फ़ंक्शन कॉल से ठीक पहले इसे हमारे users.php फ़ाइल में शामिल देख सकते हैं।
अपने व्यवस्थापक फ़ोल्डर में, admin_functions.php बनाएं और इसमें यह कोड जोड़ें:
admin_functions.php:
<?php
// Admin user variables
$admin_id = 0;
$isEditingUser = false;
$username = "";
$role = "";
$email = "";
// general variables
$errors = [];

/* - - - - - - - - - -
-  Admin users actions
- - - - - - - - - - -*/
// if user clicks the create admin button
if (isset($_POST['create_admin'])) {
	createAdmin($_POST);
}
// if user clicks the Edit admin button
if (isset($_GET['edit-admin'])) {
	$isEditingUser = true;
	$admin_id = $_GET['edit-admin'];
	editAdmin($admin_id);
}
// if user clicks the update admin button
if (isset($_POST['update_admin'])) {
	updateAdmin($_POST);
}
// if user clicks the Delete admin button
if (isset($_GET['delete-admin'])) {
	$admin_id = $_GET['delete-admin'];
	deleteAdmin($admin_id);
}


/* * * * * * * * * * * * * * * * * * * * * * * * * * * * *
* - Returns all admin users and their corresponding roles
* * * * * * * * * * * * * * * * * * * * * * * * * * * * * */
function getAdminUsers(){
	global $conn, $roles;
	$sql = "SELECT * FROM users WHERE role IS NOT NULL";
	$result = mysqli_query($conn, $sql);
	$users = mysqli_fetch_all($result, MYSQLI_ASSOC);

	return $users;
}
/* * * * * * * * * * * * * * * * * * * * *
* - Escapes form submitted value, hence, preventing SQL injection
* * * * * * * * * * * * * * * * * * * * * */
function esc(String $value){
	// bring the global db connect object into function
	global $conn;
	// remove empty space sorrounding string
	$val = trim($value);
	$val = mysqli_real_escape_string($conn, $value);
	return $val;
}
// Receives a string like 'Some Sample String'
// and returns 'some-sample-string'
function makeSlug(String $string){
	$string = strtolower($string);
	$slug = preg_replace('/[^A-Za-z0-9-]+/', '-', $string);
	return $slug;
}
?>
अपने ब्राउज़र पर डैशबोर्ड.php पृष्ठ को पुनः लोड करें और त्रुटि संदेश चला गया है।
इसके बाद navbar.php पेज और menu.php पेज को शामिल करना है। ये सार्वजनिक क्षेत्र की तरह ही व्यवस्थापक पृष्ठों के दोहराए जाने वाले खंड हैं।
तो, इन 2 फ़ाइलों को व्यवस्थापक के अंदर बनाएं/फ़ोल्डर शामिल करें:navbar.php और menu.php।
navbar.php:
<div class="header">
<div class="logo">
<a href="<?php echo BASE_URL .'admin/dashboard.php' ?>">
<h1>LifeBlog - Admin</h1>
</a>
</div>
<div class="user-info">
<span>Awa</span> <a href="<?php echo BASE_URL . '/logout.php'; ?>" class="logout-btn">logout</a>
</div>
</div>menu.php:
<div class="menu">
	<div class="card">
		<div class="card-header">
			<h2>Actions</h2>
		</div>
		<div class="card-content">
			<a href="<?php echo BASE_URL . 'admin/create_post.php' ?>">Create Posts</a>
			<a href="<?php echo BASE_URL . 'admin/posts.php' ?>">Manage Posts</a>
			<a href="<?php echo BASE_URL . 'admin/users.php' ?>">Manage Users</a>
			<a href="<?php echo BASE_URL . 'admin/topics.php' ?>">Manage Topics</a>
		</div>
	</div>
</div>
अब एडमिन सेक्शन के लिए स्टाइलिंग बनाते हैं। पूर्ण-ब्लॉग-php/static/css/ फ़ोल्डर के अंदर, admin_styling.css नाम की एक फ़ाइल बनाएं और इसमें यह कोड जोड़ें:
/* * * * * * * * * *
* STYLING DEFAULTS
* * * * * * * * * */
* { margin: 0px; padding: 0px; }
a { text-decoration: none; }
h1, h2, h3, h4, h5, h6 { font-family: 'Noto Serif', serif; }
/* forms */
form { width: 60%; margin: 5px auto; padding-bottom: 50px; }
form input[type=file], input[type=email], input[type=password], input[type=text],
form select, form textarea {
	width: 100%;
	display: block;
	padding: 13px 13px;
	font-size: 1em;
	margin: 5px auto 10px;
	border-radius: 3px;
	box-sizing : border-box;
	background: transparent;
	border: 1px solid #3E606F;
}
input[type="checkbox"] { height: 20px; float: left; }
form button { float: right; margin-left: 24%; }
form input:focus { outline: none; }
label {	margin-top: 20px; float: left; }
/* tables */
table { border-collapse: collapse; width: 70%; margin: 20px auto; }
th, td { padding: 8px; text-align: left; border: 1px solid #ddd; }
th { text-align: center;}
/* buttons */
.btn {
	color: white;
	background: #4E6166;
	text-align: center;
	border: none;
	border-radius: 5px;
	display: block;
	letter-spacing: .1em;
	padding: 13px 20px;
	text-decoration: none;
}
/* * * * * * * * * *
* HEADER
* * * * * * * * * */
.header {
	padding: 15px 45px;
	font-family: 'Noto Serif', serif;
	color: white;
	background: black;
}
.header .logo { width: 50%; float: left; }
.header .logo h1 { color: white; }
.header .user-info { width: 10%; margin-top: 10px; float: right;}
.header .logout-btn { color: red; text-decoration: none; }
.header:after{ content: ""; display: block; clear: both; }
/* * * * * * * * * *
* DASHBOARD
* * * * * * * * * */
.container {
	width: 95%;
	margin: 5px auto 50px;
	border: 1px solid #BFBCB3;
	padding: 10px 0px 50px;
}
.container:after { content: ""; display: block; clear: both; }
.container.dashboard h1 { text-align: center; margin: 25px; }
.container.dashboard .stats a {
	display: inline-block;
	padding: 30px;
	margin: 5px;
	width: 25%;
	text-align: center;
	border-radius: 3px;
	border: 1px solid #BFBCB3;
}
.container.dashboard .stats a.first { margin-left: 25px; }
.container.dashboard .stats a:hover { cursor: pointer; background-color: #E1E1E1; }
.container.dashboard .buttons { margin-left: 15px; }
.container.dashboard .buttons a {
	display: inline-block;
	margin: 10px;
	text-decoration: none;
	color: #444;
	padding: 10px 25px;
	border: none;
	background-color: #0E7D92;
	color: white;
}
/* * * * * * * * * *
* PAGE CONTENT
* * * * * * * * * */
.container.content .menu { width: 16%; float: left; padding: 40px 10px; }
/* Menu card */
.container.content .menu .card .card-header {
	padding: 10px;
	text-align: center;
	border-radius: 3px 3px 0px 0px;
	background: #3E606F;
}
.container.content .menu .card .card-header h2 { color: white; }
.container.content .menu .card .card-content a {
	display: block;
	box-sizing: border-box;
	padding: 8px 10px;
	border-bottom: 1px solid #e4e1e1;
	color: #444;
}
.container.content .menu .card .card-content a:hover {
	padding-left: 20px; background: #F9F9F9; transition: 0.1s;
}
/* Actions div (at the middle) */
.container.content .action { width: 35%; float: left; text-align: center; }
.container.content .action form { width: 90%; }
.container.content .action .page-title { margin: 25px; }
.container.content .action.create-post-div { width: 80%; }
/* Table div (Displaying records from DB) */
.table-div { float: left; width: 47%; }
.table-div .message { width: 90%; margin-top: 20px; }
.table-div table { width: 90%; }
.table-div a.fa { color: white; padding: 3px; }
.table-div .edit { background: #004220; }
.table-div .delete { background: #F70E1A; }
.table-div .publish { background: red; }
.table-div .unpublish { background: green; }
/* * * * * * * * * *
* VALIDATION ERRORS
* * * * * * * * * */
.message {
	width: 100%;
	margin: 0px auto;
	padding: 10px 0px;
	color: #3c763d;
	background: #dff0d8;
	border: 1px solid #3c763d;
	border-radius: 5px;
	text-align: center;
}
.error {color: #a94442; background: #f2dede; border: 1px solid #a94442; margin-bottom: 20px; }
.validation_errors p {text-align: left;margin-left: 10px;}
अपने ब्राउज़र में, https://localhost/complete-blog-php/admin/users.php पर जाएं, आपको एक त्रुटि दिखाई देगी जो कहती है कि फ़ाइल संदेश.php नहीं मिली है। अपने पूर्ण-ब्लॉग-ph/शामिल फ़ोल्डर में messages.php नाम की एक फ़ाइल बनाएं और उसमें यह कोड जोड़ें:
<?php if (isset($_SESSION['message'])) : ?>
      <div class="message" >
      	<p>
          <?php
          	echo $_SESSION['message'];
          	unset($_SESSION['message']);
          ?>
      	</p>
      </div>
<?php endif ?>
यह उपयोगकर्ता को उनके कार्यों पर प्रतिक्रिया देने के लिए अधिसूचना संदेश प्रदर्शित करता है।
व्यवस्थापक उपयोगकर्ता बनाएं, पढ़ें, अपडेट करें और हटाएं
users.php पृष्ठ पहले से ही एक व्यवस्थापक उपयोगकर्ता बनाने और अपडेट करने, साथ ही उपयोगकर्ताओं को सूचीबद्ध करने और हटाने के लिए एक तालिका दोनों के लिए एक फॉर्म प्रस्तुत करता है। जो कुछ बचा है वह इन क्रियाओं को करने वाले PHP कार्यों को जोड़ना है। तो admin_functions.php फ़ाइल खोलें और पेज के शीर्ष पर और getAdminUsers() फ़ंक्शन:
से पहले सीधे व्यवस्थापक उपयोगकर्ता क्रियाओं (यदि कथन) के बाद इस कोड को जोड़ें:admin_functions.php:
/* - - - - - - - - - - - -
-  Admin users functions
- - - - - - - - - - - - -*/
/* * * * * * * * * * * * * * * * * * * * * * *
* - Receives new admin data from form
* - Create new admin user
* - Returns all admin users with their roles
* * * * * * * * * * * * * * * * * * * * * * */
function createAdmin($request_values){
	global $conn, $errors, $role, $username, $email;
	$username = esc($request_values['username']);
	$email = esc($request_values['email']);
	$password = esc($request_values['password']);
	$passwordConfirmation = esc($request_values['passwordConfirmation']);

	if(isset($request_values['role'])){
		$role = esc($request_values['role']);
	}
	// form validation: ensure that the form is correctly filled
	if (empty($username)) { array_push($errors, "Uhmm...We gonna need the username"); }
	if (empty($email)) { array_push($errors, "Oops.. Email is missing"); }
	if (empty($role)) { array_push($errors, "Role is required for admin users");}
	if (empty($password)) { array_push($errors, "uh-oh you forgot the password"); }
	if ($password != $passwordConfirmation) { array_push($errors, "The two passwords do not match"); }
	// Ensure that no user is registered twice.
	// the email and usernames should be unique
	$user_check_query = "SELECT * FROM users WHERE username='$username'
							OR email='$email' LIMIT 1";
	$result = mysqli_query($conn, $user_check_query);
	$user = mysqli_fetch_assoc($result);
	if ($user) { // if user exists
		if ($user['username'] === $username) {
		  array_push($errors, "Username already exists");
		}

		if ($user['email'] === $email) {
		  array_push($errors, "Email already exists");
		}
	}
	// register user if there are no errors in the form
	if (count($errors) == 0) {
		$password = md5($password);//encrypt the password before saving in the database
		$query = "INSERT INTO users (username, email, role, password, created_at, updated_at)
				  VALUES('$username', '$email', '$role', '$password', now(), now())";
		mysqli_query($conn, $query);

		$_SESSION['message'] = "Admin user created successfully";
		header('location: users.php');
		exit(0);
	}
}
/* * * * * * * * * * * * * * * * * * * * *
* - Takes admin id as parameter
* - Fetches the admin from database
* - sets admin fields on form for editing
* * * * * * * * * * * * * * * * * * * * * */
function editAdmin($admin_id)
{
	global $conn, $username, $role, $isEditingUser, $admin_id, $email;

	$sql = "SELECT * FROM users WHERE id=$admin_id LIMIT 1";
	$result = mysqli_query($conn, $sql);
	$admin = mysqli_fetch_assoc($result);

	// set form values ($username and $email) on the form to be updated
	$username = $admin['username'];
	$email = $admin['email'];
}

/* * * * * * * * * * * * * * * * * * * * * * * * * * * * * *
* - Receives admin request from form and updates in database
* * * * * * * * * * * * * * * * * * * * * * * * * * * * * * */
function updateAdmin($request_values){
	global $conn, $errors, $role, $username, $isEditingUser, $admin_id, $email;
	// get id of the admin to be updated
	$admin_id = $request_values['admin_id'];
	// set edit state to false
	$isEditingUser = false;


	$username = esc($request_values['username']);
	$email = esc($request_values['email']);
	$password = esc($request_values['password']);
	$passwordConfirmation = esc($request_values['passwordConfirmation']);
	if(isset($request_values['role'])){
		$role = $request_values['role'];
	}
	// register user if there are no errors in the form
	if (count($errors) == 0) {
		//encrypt the password (security purposes)
		$password = md5($password);

		$query = "UPDATE users SET username='$username', email='$email', role='$role', password='$password' WHERE id=$admin_id";
		mysqli_query($conn, $query);

		$_SESSION['message'] = "Admin user updated successfully";
		header('location: users.php');
		exit(0);
	}
}
// delete admin user
function deleteAdmin($admin_id) {
	global $conn;
	$sql = "DELETE FROM users WHERE id=$admin_id";
	if (mysqli_query($conn, $sql)) {
		$_SESSION['message'] = "User successfully deleted";
		header("location: users.php");
		exit(0);
	}
}
हमने जो कोड अभी जोड़ा है उसके 3 मुख्य भाग हैं:उस क्रम में व्यवस्थापक उपयोगकर्ता चर, व्यवस्थापक उपयोगकर्ता क्रियाएं, और व्यवस्थापक उपयोगकर्ता फ़ंक्शन का प्रारंभ। यह वही प्रारूप है जिसमें हम आगे आने वाले विषयों के लिए कोड जोड़ेंगे। अभी के लिए, आप पहले से ही उपयोगकर्ता बना सकते हैं, पढ़ सकते हैं, अपडेट कर सकते हैं और हटा सकते हैं।
अब https://localhost/complete/admin/users.php पर जाएं। एक उपयोगकर्ता बनाएं और उस उपयोगकर्ता को व्यवस्थापक भूमिका सौंपें। सुनिश्चित करें कि आपको इस व्यवस्थापक उपयोगकर्ता का उपयोगकर्ता नाम और पासवर्ड याद है क्योंकि भविष्य में हम इस उपयोगकर्ता के साथ लॉग इन करेंगे। उदाहरण के लिए:
उपयोगकर्ता नाम:जॉन, ईमेल:john@example.com, पासवर्ड:जॉन्डो।
विषय बनाएं, पढ़ें, अपडेट करें और हटाएं
विषयों के लिए, हम केवल एक फ़ाइल बनाने जा रहे हैं, विषय.php पूर्ण-ब्लॉग-php/admin/ फ़ोल्डर के अंदर।
पूर्ण-ब्लॉग-php/admin/topics.php:
<?php  include('../config.php'); ?>
<?php  include(ROOT_PATH . '/admin/includes/admin_functions.php'); ?>
<?php include(ROOT_PATH . '/admin/includes/head_section.php'); ?>
<!-- Get all topics from DB -->
<?php $topics = getAllTopics();	?>
	<title>Admin | Manage Topics</title>
</head>
<body>
	<!-- admin navbar -->
	<?php include(ROOT_PATH . '/admin/includes/navbar.php') ?>
	<div class="container content">
		<!-- Left side menu -->
		<?php include(ROOT_PATH . '/admin/includes/menu.php') ?>

		<!-- Middle form - to create and edit -->
		<div class="action">
			<h1 class="page-title">Create/Edit Topics</h1>
			<form method="post" action="<?php echo BASE_URL . 'admin/topics.php'; ?>" >
				<!-- validation errors for the form -->
				<?php include(ROOT_PATH . '/includes/errors.php') ?>
				<!-- if editing topic, the id is required to identify that topic -->
				<?php if ($isEditingTopic === true): ?>
					<input type="hidden" name="topic_id" value="<?php echo $topic_id; ?>">
				<?php endif ?>
				<input type="text" name="topic_name" value="<?php echo $topic_name; ?>" placeholder="Topic">
				<!-- if editing topic, display the update button instead of create button -->
				<?php if ($isEditingTopic === true): ?>
					<button type="submit" class="btn" name="update_topic">UPDATE</button>
				<?php else: ?>
					<button type="submit" class="btn" name="create_topic">Save Topic</button>
				<?php endif ?>
			</form>
		</div>
		<!-- // Middle form - to create and edit -->

		<!-- Display records from DB-->
		<div class="table-div">
			<!-- Display notification message -->
			<?php include(ROOT_PATH . '/includes/messages.php') ?>
			<?php if (empty($topics)): ?>
				<h1>No topics in the database.</h1>
			<?php else: ?>
				<table class="table">
					<thead>
						<th>N</th>
						<th>Topic Name</th>
						<th colspan="2">Action</th>
					</thead>
					<tbody>
					<?php foreach ($topics as $key => $topic): ?>
						<tr>
							<td><?php echo $key + 1; ?></td>
							<td><?php echo $topic['name']; ?></td>
							<td>
								<a class="fa fa-pencil btn edit"
									href="topics.php?edit-topic=<?php echo $topic['id'] ?>">
								</a>
							</td>
							<td>
								<a class="fa fa-trash btn delete"
									href="topics.php?delete-topic=<?php echo $topic['id'] ?>">
								</a>
							</td>
						</tr>
					<?php endforeach ?>
					</tbody>
				</table>
			<?php endif ?>
		</div>
		<!-- // Display records from DB -->
	</div>
</body>
</html>
आगे हम विषय पर इन कार्यों को करने के लिए PHP कोड को admin_functions.php के अंदर लिखते हैं।
निम्नलिखित कोड में तीन खंड हैं। प्रत्येक अनुभाग को एक टिप्पणी का उपयोग करके शीर्ष पर लेबल किया गया है और तीन चर, क्रिया और कार्य हैं। तो अपनी admin_functions.php फ़ाइल में, इसमें निम्न कोड जोड़ें लेकिन सुनिश्चित करें कि आप इसे टिप्पणियों का उपयोग करके नीचे बताए अनुसार विभाजित करते हैं।
admin_functions.php:
<?php
// Admin user variables
// ... varaibles here ...

// Topics variables
$topic_id = 0;
$isEditingTopic = false;
$topic_name = "";

/* - - - - - - - - - -
-  Admin users actions
- - - - - - - - - - -*/
// ...

/* - - - - - - - - - -
-  Topic actions
- - - - - - - - - - -*/
// if user clicks the create topic button
if (isset($_POST['create_topic'])) { createTopic($_POST); }
// if user clicks the Edit topic button
if (isset($_GET['edit-topic'])) {
	$isEditingTopic = true;
	$topic_id = $_GET['edit-topic'];
	editTopic($topic_id);
}
// if user clicks the update topic button
if (isset($_POST['update_topic'])) {
	updateTopic($_POST);
}
// if user clicks the Delete topic button
if (isset($_GET['delete-topic'])) {
	$topic_id = $_GET['delete-topic'];
	deleteTopic($topic_id);
}


/* - - - - - - - - - - - -
-  Admin users functions
- - - - - - - - - - - - -*/
// ...

/* - - - - - - - - - -
-  Topics functions
- - - - - - - - - - -*/
// get all topics from DB
function getAllTopics() {
	global $conn;
	$sql = "SELECT * FROM topics";
	$result = mysqli_query($conn, $sql);
	$topics = mysqli_fetch_all($result, MYSQLI_ASSOC);
	return $topics;
}
function createTopic($request_values){
	global $conn, $errors, $topic_name;
	$topic_name = esc($request_values['topic_name']);
	// create slug: if topic is "Life Advice", return "life-advice" as slug
	$topic_slug = makeSlug($topic_name);
	// validate form
	if (empty($topic_name)) {
		array_push($errors, "Topic name required");
	}
	// Ensure that no topic is saved twice.
	$topic_check_query = "SELECT * FROM topics WHERE slug='$topic_slug' LIMIT 1";
	$result = mysqli_query($conn, $topic_check_query);
	if (mysqli_num_rows($result) > 0) { // if topic exists
		array_push($errors, "Topic already exists");
	}
	// register topic if there are no errors in the form
	if (count($errors) == 0) {
		$query = "INSERT INTO topics (name, slug)
				  VALUES('$topic_name', '$topic_slug')";
		mysqli_query($conn, $query);

		$_SESSION['message'] = "Topic created successfully";
		header('location: topics.php');
		exit(0);
	}
}
/* * * * * * * * * * * * * * * * * * * * *
* - Takes topic id as parameter
* - Fetches the topic from database
* - sets topic fields on form for editing
* * * * * * * * * * * * * * * * * * * * * */
function editTopic($topic_id) {
	global $conn, $topic_name, $isEditingTopic, $topic_id;
	$sql = "SELECT * FROM topics WHERE id=$topic_id LIMIT 1";
	$result = mysqli_query($conn, $sql);
	$topic = mysqli_fetch_assoc($result);
	// set form values ($topic_name) on the form to be updated
	$topic_name = $topic['name'];
}
function updateTopic($request_values) {
	global $conn, $errors, $topic_name, $topic_id;
	$topic_name = esc($request_values['topic_name']);
	$topic_id = esc($request_values['topic_id']);
	// create slug: if topic is "Life Advice", return "life-advice" as slug
	$topic_slug = makeSlug($topic_name);
	// validate form
	if (empty($topic_name)) {
		array_push($errors, "Topic name required");
	}
	// register topic if there are no errors in the form
	if (count($errors) == 0) {
		$query = "UPDATE topics SET name='$topic_name', slug='$topic_slug' WHERE id=$topic_id";
		mysqli_query($conn, $query);

		$_SESSION['message'] = "Topic updated successfully";
		header('location: topics.php');
		exit(0);
	}
}
// delete topic
function deleteTopic($topic_id) {
	global $conn;
	$sql = "DELETE FROM topics WHERE id=$topic_id";
	if (mysqli_query($conn, $sql)) {
		$_SESSION['message'] = "Topic successfully deleted";
		header("location: topics.php");
		exit(0);
	}
}
इससे हम विषय बना सकते हैं, पढ़ सकते हैं, अपडेट कर सकते हैं और हटा सकते हैं।
आपके धैर्य के लिए धन्यवाद। अगले भाग में, हम पोस्ट बनाने के लिए एक फॉर्म जोड़ते हैं। उपयोगकर्ता को टेक्स्ट, इमेज और सूचियों में स्टाइल जोड़ने की क्षमता देने के लिए हम ckeditor का उपयोग करते हैं।
वहां मिलते हैं!