एक व्यवस्थापक क्षेत्र स्थापित करने और वास्तव में सभी व्यवस्थापक मार्गों और नियंत्रकों का निर्माण किए बिना पांच मिनट में अपने डेटा के साथ काम करना शुरू करने का एक तरीका है। यहां बताया गया है...
हमारे पास केवल मॉडल होने चाहिए और फिर हम अपने मॉडल के अलावा कुछ भी नहीं के आधार पर पूरी तरह से काम करने वाले डैशबोर्ड को चलाने के लिए AdminBro पैकेज का उपयोग कर सकते हैं।
सबसे पहले हमें एक्सप्रेस सर्वर सेट करना होगा।
mkdir server
cd server
npm init
आइए एक्सप्रेस और एडमिन ब्रो पैकेज स्थापित करें:
npm i @adminjs/express @adminjs/mongoose adminjs express mongoose
अब हमें मॉडलों के लिए एक फोल्डर बनाने की जरूरत है
mkdir models
और मॉडल के लिए फ़ाइलें, मान लें कि हम उत्पादों और श्रेणियों के लिए एक मॉडल बनाएंगे
touch models/products.js models/categories.js
आइए उत्पाद के लिए models/products.js . में स्कीमा परिभाषित करें :
const mongoose = require('mongoose');
const Schema = mongoose.Schema;

const productsSchema = new Schema({
  product: {
    type: String,
    required: true,
    unique: true
  },
  price: {
    type: Number,
    required: true
  },
  categoryId: {
    type: Schema.Types.ObjectId, ref: 'categories',
    required: true
  },
});

module.exports = mongoose.model('products', productsSchema);
और models/categories.js . के अंदर की श्रेणियों के लिए :
const mongoose = require('mongoose');
const Schema = mongoose.Schema;

const categoriesSchema = new Schema({
    category: {
        type: String,
        required: true,
        unique: true
    }
},
{strictQuery: false}
)
module.exports =  mongoose.model('categories', categoriesSchema);
अब मुख्य सर्वर फ़ाइल index.js बनाते हैं हमारे server . के अंदर फ़ोल्डर:
touch index.js
और इसमें इस बेसिक बेयरबोन कोड को जोड़ें:
// GENERAL CONFIG
const app = require('express')();
const port = process.env.PORT || 5050;

// CONNECTING TO DB
const mongoose = require('mongoose');
(async function () {
  try {
    await mongoose.connect('mongodb://127.0.0.1/ourDatabase');
    console.log('Your DB is running');
  } catch (error) {
    console.log('your DB is not running. Start it up!');
  }
})();

app.listen(port, () => console.log(`🚀 Server running on port ${port} 🚀`));
अब हम अपना सर्वर nodemon . के साथ चला सकते हैं और देखें कि यह स्थानीय मोंगो डेटाबेस से जुड़ा हुआ है और चल रहा है।
अब अंतिम चरण -- हमें अपने मॉडलों को आयात करने की आवश्यकता है और बाकी काम एडमिन ब्रो करेगा।
इसे अपने index.js . में जोड़ें डीबी से कनेक्ट करने के बाद फ़ाइल:
// ADMIN BRO
const AdminJS = require('adminjs');
const AdminJSExpress = require('@adminjs/express')
// We have to tell AdminJS that we will manage mongoose resources with it
AdminJS.registerAdapter(require('@adminjs/mongoose'));
// Import all the project's models
const Categories = require('./models/categories'); // replace this for your model
const Products = require('./models/products'); // replace this for your model
// Pass configuration settings  and models to AdminJS
const adminJS = new AdminJS({
  resources: [Categories, Products],
  rootPath: '/admin'
});
// Build and use a router which will handle all AdminJS routes
const router = AdminJSExpress.buildRouter(adminJS);
app.use(adminJS.options.rootPath, router);
// END ADMIN BRO
जैसा कि आप व्यवस्थापक भाई को आयात करने के बाद देख सकते हैं कि हमें अपने मॉडल की आवश्यकता है:
const Categories = require('./models/categories'); // replace this for your model
const Products = require('./models/products'); // replace this for your model
और फिर उन्हें पास करना (Categories और Products ) इस उदाहरण में व्यवस्थापक भाई में):
const adminJS = new AdminJS({
  resources: [Categories, Products],
  rootPath: '/admin'
});
साथ ही rootPath: '/admin' . में डैशबोर्ड के लिए पथ सेट करना
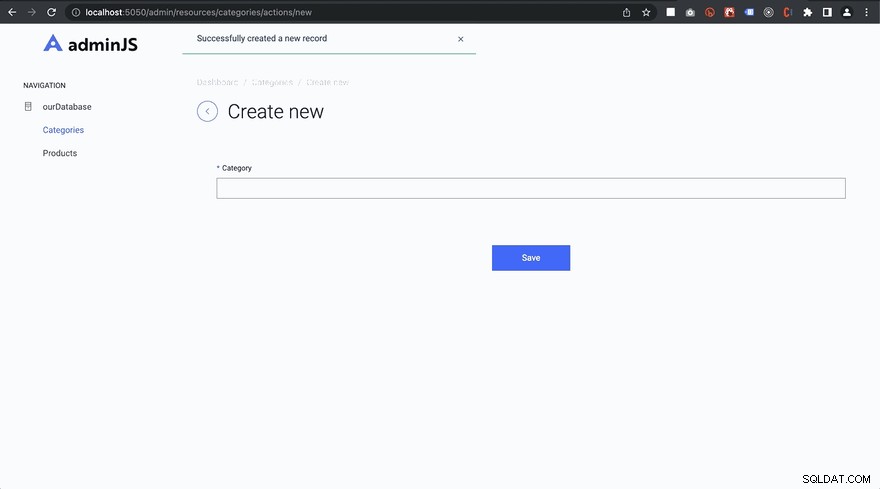
अब यदि हम अपने सर्वर को निर्दिष्ट पोर्ट (इस उदाहरण में 5050) पर खोलेंगे और व्यवस्थापक url (/admin) पर जाएंगे ) इस उदाहरण में हम अपने डेटा के साथ उपयोग के लिए तैयार शानदार डैशबोर्ड देखेंगे।
GitHub पर डेमो रेपो


